
Most surprise proposals get planned in the wrong order. People pick the ring first, the date second, the location third, and the photographer fourth — usually about a week before, when they remember they probably want photos. By that point half the good decisions have already been locked in by accident. The light is wrong because nobody thought about the time of day. The location is crowded because nobody thought about the day of the week. The photographer is hustling to figure out how to hide somewhere they've never been. It can still work, but it works in spite of the planning, not because of it.
This is the order I wish more people followed. I've shot a lot of proposals in Boston — quiet ones at sunrise, loud ones at sunset, ones where the family was waiting at a restaurant ten minutes away, ones where she had no idea anyone existed within a mile of her. The good ones share more in common than the bad ones. Here's the playbook I'd use if I were planning my own.

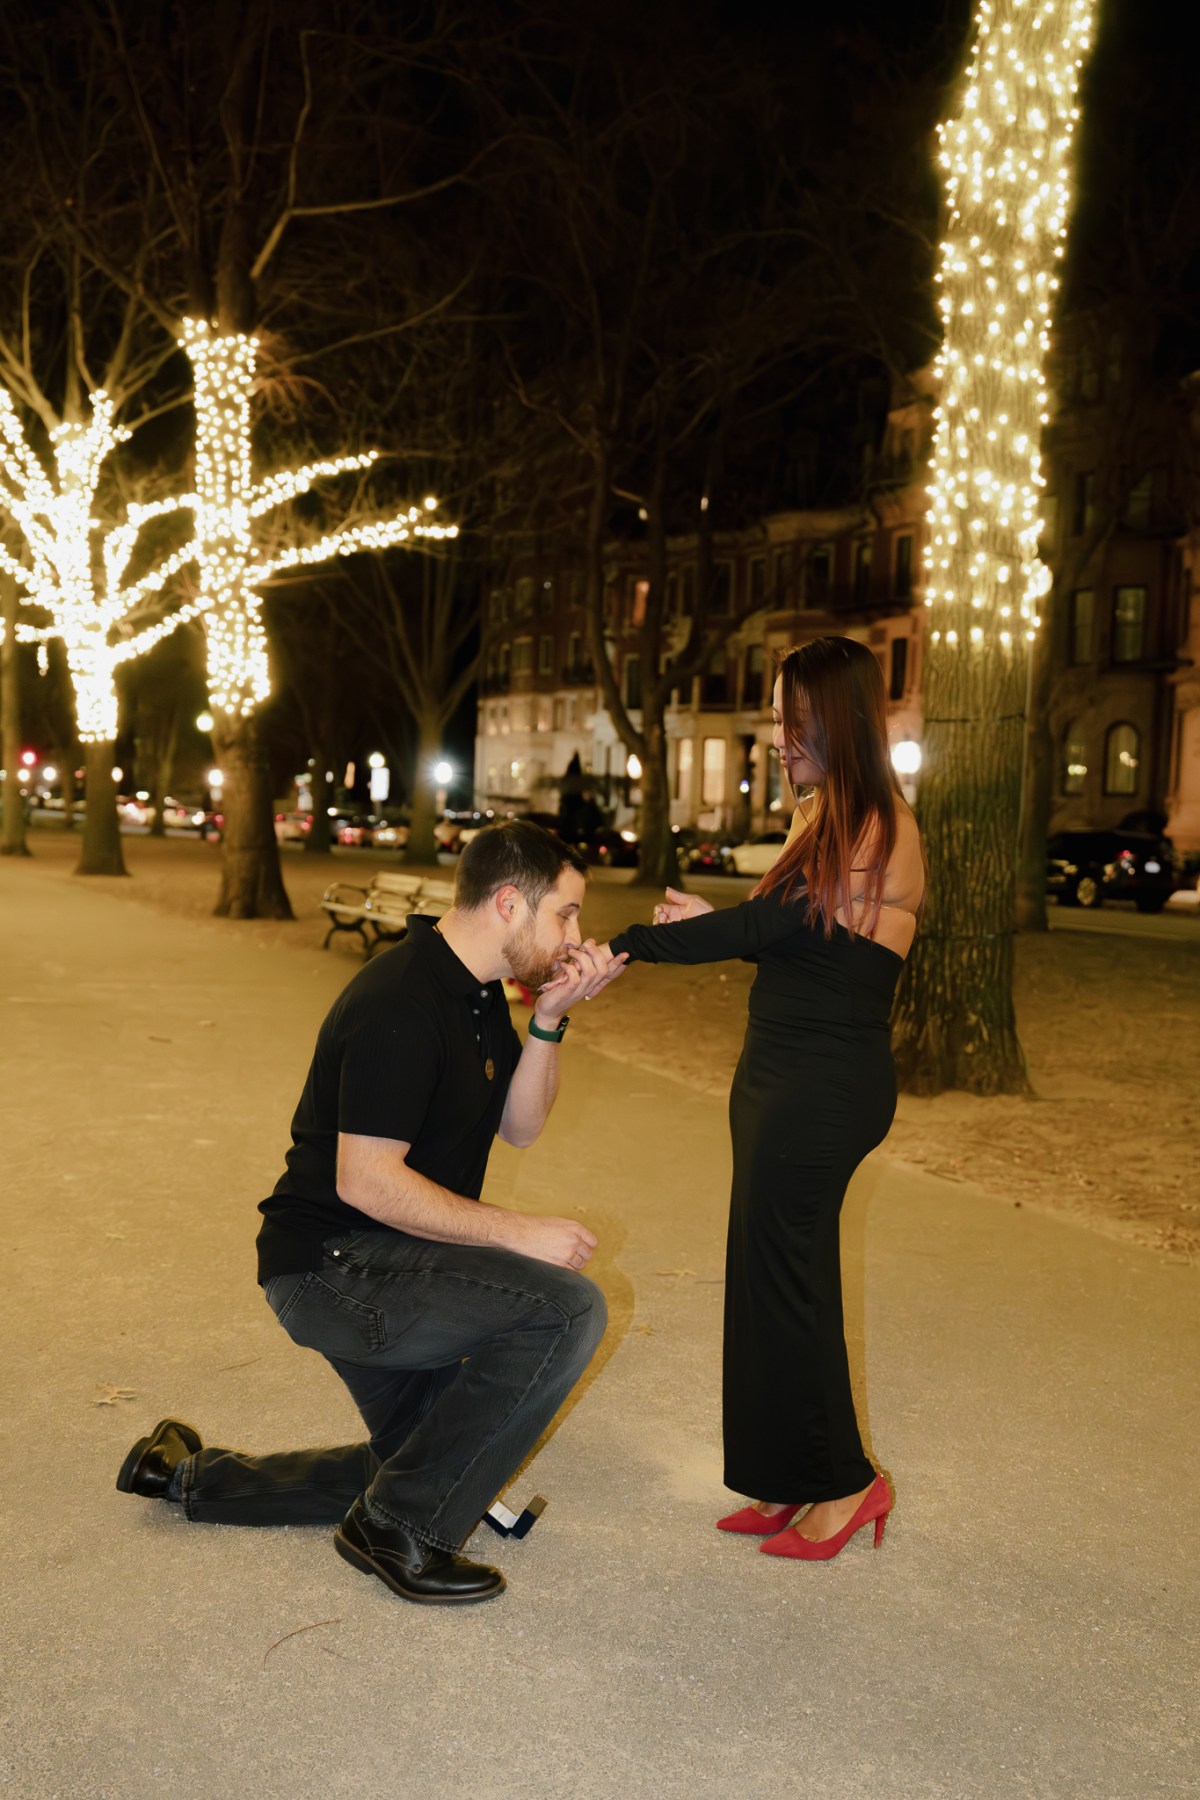
Step 01 Pick the location first
Location drives everything else — the time of day, the time of year, where I hide, what lens I bring, how the photos look a year from now when you're choosing what to print. Pick the location first and the rest of the plan falls into place. Pick it last and you're forcing decisions to fit a spot that wasn't built for them.
The best location isn't the prettiest one. It's the one that means something to her, photographs well in the season you're proposing in, and matches the kind of moment you want — quiet vs. cinematic, private vs. iconic, planned vs. spontaneous. I wrote a longer piece on this with my honest ranking of the city's best spots: 10 best proposal spots in Boston. Read that first if you don't already have a place in mind.
The shortcut: if she likes classic Boston, the Public Garden. If she likes modern and cinematic, the Seaport. If she likes quiet, the Arnold Arboretum. If you had a meaningful first date somewhere specific, that beats all three.
Step 02 Time it for the light
The single biggest variable in how your photos turn out is the light, and the light is decided entirely by what hour you propose. The hour before sunset is the best window 90% of the time. It's called golden hour for a reason — the sun is low, the shadows are soft, the colors are warm, and everyone's skin looks 30% better than it does at noon. If you want your photos to look like the proposal photos you've seen on Instagram and saved to a folder, propose in golden hour.

The other variable is the day of the week. Weekends are crowded everywhere. Weekday mornings and weekday evenings are the two times almost every Boston location empties out. If you can swing a weekday, swing a weekday. If you can't, weekend mornings are the next best thing — most of the city is still in bed and the popular spots are 70% emptier than they'll be by lunch.
Step 03 Hire the photographer
Hire the photographer before you do anything else logistical. Not because I'm trying to drum up business — because the photographer is the only person involved who's done this exact thing before, in this exact city, dozens of times. A good proposal photographer will tell you which corner of the location to use, what time to be there, what to wear, what to tell her to get her there without suspicion, where the photographer will hide, and how to signal that the moment is about to happen. None of that comes free with the location. It comes from experience.
A few things to look for when you're hiring someone: ask if they've shot at your specific location before. Ask what lens they'll bring (the answer should involve a long telephoto — usually a 70-200mm — so they can stay far away and still get close-up frames). Ask how they handle the surprise itself — do they hide, or do they pretend to be a tourist with a camera? Both can work, but they should have a clear answer. And ask to see real proposal work, not just engagement sessions, because the two are completely different jobs.
If you want a sense of what I charge for proposals, I broke it down in Boston wedding photography costs in 2026 — proposals are at the lower end of my pricing.
Step 04 Build the decoy plan
This is the part most people overthink. The decoy plan is whatever excuse gets her to the right spot at the right time without her getting suspicious. The best decoy plans are boring — a walk after dinner, a coffee in the neighborhood, a stop on the way to something else. Suspiciously elaborate plans are the ones that get her asking questions.

A few decoys that have worked for couples I've shot:
- "We have dinner reservations at 7. Let's walk through the Public Garden first since we have time." (Real plan: propose in the garden at 6:15. Reservation is at 7:30 to give buffer.)
- "My friend recommended a coffee place in the North End — want to walk over and check it out?" (Real plan: stop at Christopher Columbus Park on the way.)
- "I want to take a few photos of you in your new outfit for my mom." (Real plan: photographer is already in position. The "few photos" become the proposal.)
- "Let's go for a sunset walk on the Esplanade — we haven't done that in a while." (Real plan: photographer is on a footbridge half a block away with a long lens.)
The pattern is the same across all of them: the cover story is something she'd believe without thinking twice, the timing is built around the actual proposal window, and there's always a slightly later "real" plan (dinner, drinks, family) to give the surprise a soft landing.
Step 05 Set the signal
The signal is how the photographer knows the moment is about to happen. This is the most overlooked part of every proposal plan, and it's the part that makes the difference between a photographer catching the first frame and missing it. You need to agree on a clear, unmistakable signal in advance.
The signals I've used and liked: taking off a hat, adjusting your watch, putting one hand in your jacket pocket, stopping mid-walk and pointing at something across the water. Anything that's deliberate, slightly unusual, and impossible to miss from 50 yards away with a long lens. What you want to avoid is a verbal cue (the photographer can't hear you), a tiny gesture (the photographer can't see it), or anything she might do herself by accident (so it's actually distinct).
Once you give the signal, count to three in your head, then drop. The three-second buffer gives the photographer time to focus, frame, and start shooting. Without it, you're proposing into a half-ready camera.
Step 06 Plan what happens after
The proposal itself takes about 30 seconds. Everything that happens after is 90% of what people remember a year later. Plan it.

The after-plan should include three things: a portrait window with the photographer (15-30 minutes of "we just got engaged" photos in the same location, while the light is still good and the moment is still raw), a way to call family (FaceTime is the move — nobody wants to hear the news over text), and a meal or drinks somewhere nice with a reservation already on the books. The best proposals I've shot all had some version of this. The worst ones ended with the couple standing on a sidewalk wondering what to do next.
The proposal is the moment. The hour after is the memory. Plan both.
The five mistakes I see most
If you skim the rest of this guide, read this section. These are the five things I see go wrong on proposals over and over:
- Booking the photographer too late. The good proposal photographers book out 4-8 weeks in advance, especially in spring and fall. Reach out earlier than you think you need to.
- Picking a spot you've never been to in person. Walk the location yourself a week before. Check what the light is doing at the same time of day you're planning to propose. The internet photos are always taken in different conditions than the day you'll be there.
- Telling too many people. Every additional person who knows is one more chance the surprise leaks. Tell the photographer, tell whoever is booking the dinner reservation, tell whoever is helping with the ring. That's it.
- Skipping the portrait window after. The most-printed photo from any proposal is rarely the proposal itself — it's the portrait taken five minutes later when both of you are laughing and crying at the same time. Don't skip that part.
- Forgetting the ring box matters. A nice ring box photographs better than a velvet bag, and the close-up of the ring on her hand is one of the most-asked-for shots. Bring something that looks good on camera.
The honest truth about surprise proposals
The best ones look effortless because they were planned to within an inch of their life. The location was scouted, the light was timed, the photographer was hidden, the signal was rehearsed, the after-plan was set, and the reservation was made. None of that is visible in the photos — and that's the point. Every single thing that looks like luck or magic in a great proposal photo is actually the result of someone deciding it should look that way two weeks earlier.
If you want help planning yours — picking the spot, picking the time, building the decoy, setting the signal, hiding behind the right tree — that's exactly what I do. Get in touch and tell me what you're thinking. I'll give you my honest read, and if I'm available for your date, I'd love to be the one behind the lens.


